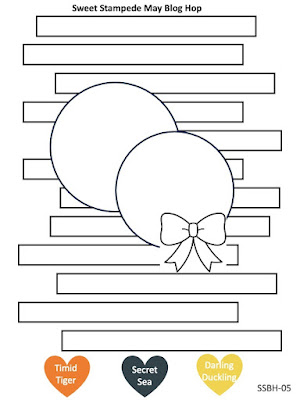
- Calypso Coral 4-1/4" x 11", folded in half (card base)
- Pecan Pie cardstock layer: 3-3/4" x 5"
- Designer Series Paper layer (country home pattern) 3-1/2" x 4" card front (cut down to 3 strips; 1-1/4" x 3-1/2" (top), 1-1/4" 3-1/2" (middle) and 1-1/2" x 3-1/2" (bottom)
- Lost Lagoon cardstock for banner 3/4" x 3-1/4", cut in half
- Basic Beige cardstock for stitched square 2-3/4" x 2-3/4"
- Basic Beige cardstock 4" x 5-1/4" for interior layer
Tuesday, April 1, 2025
April Sweet Stampede Blog Hop
Saturday, March 1, 2025
March Sweet Stampede Blog Hop
- Basic White Thick cardstock 4-1/4" x 11", folded in half (card base)
- Designer Series Paper layer (Brights Collection) scraps for circles
- Daffodil Delight cardstock 4-1/4" x 5-1/2", for embossed circle
- Basic White cardstock 4" x 5" for stamping and die-cutting sentiment and bottle images
- Granny Apple Green Glimmer Paper 1" x 3" for die-cutting BABY
Saturday, February 1, 2025
February Sweet Stampede Blog Hop
- Basic White Thick cardstock 4-1/4" x 11", folded in half (card base)
- Designer Series Paper layer (wash print) 4-1/4" x 5-1/2" card front
- Pretty Peacock cardstock layer 2-3/4" x 3", embossed
- Designer Series Paper layer (strip print) 2-1/2" x 3-3/4"
- Basic White cardstock 4" x 5" for stamping and die-cutting floral images
- Lost Lagoon 1-1/4" x 3" for die-cutting sentiment label
Tuesday, January 7, 2025
January Sweet Stampede Blog Hop
Welcome to the new Sweet Stampede Blog Hop! The theme for this month is New Mini Catalog!
My project showcases the Memorable Blooms Bundle (#164826) from the new January - April 2025 Mini Catalog. It is a gorgeous new floral line art stamp set with really pretty sentiments that cover a bunch of different occasions. The coordinating dies cut out the floral images and there are also some extras that will add some really cool interest to your cards.
- Soft Seafoam cardstock 4-1/4" x 11", folded in half (card base)
- Fresh Freesia cardstock 4" x 5-1/4", embossed
- Basic White cardstock 3-1/2" x 3-1/2", for die-cutting frame
- Old Olive cardstock 2-1/2" x 4" for die-cutting foliage piece
- Basic White cardstock 3" x 4" for stamping floral image
- Fresh Freesia 1-1/4" x 2-1/2" for die-cutting sentiment label
- Basic White Cardstock 4" x 5-1/4" for interior layer
Monday, April 1, 2024
We Create Blog Hop - April Showers
The theme for this month's We Create Blog Hop is April Showers! We have all heard the saying "April showers bring May flowers" so I decided to share this card that I made as one of my swaps for OnStage in Houston last month. It showcases the Online Exclusives Flowering Zinnias Designer Series Paper. I love, love this DSP!!
The Designer Series Paper is bright & fun and full of gorgeous floral images. The sheet of paper that I used works so well with this pieced card panel design. It's a simple card but I love the way it turned out. I added a sprinkling of the Adhesive-Backed Shiny Sequins amongst the floral images in the DSP and also on the embossed layer.
- Berry Burst 5-1/2" x 8-1/2", folded in half (card base)
- Petal Pink 4-1/4" x 5-1/2", embossed
- Designer Series Paper Layer 1-1/2" x 5-1/4"
- Highland Heather Cardstock Layer 3" x 5-1/2" embossed
- Designer Series Paper floral print 3" x 3-1/2" (then cut into 3 - 1" x 3-1/2" strips)
- Basic White Cardstock 1-1/4" x 2-1/2" for die-cutting sentiment label
- Basic White Cardstock 4" x 5-1/4" for interior layer
Friday, March 1, 2024
We Create Blog Hop - March To A Different Beat
It's that time again for the We Create Blog Hop and the theme this month is March To A Different Beat! I decided to play around with one of our new additions to the Kits Collection called Rock Legend. The kit contains everything needed to make 8 cards, 4 each of 2 fun, musical designs. Perfect for that musician in your life!
Cute, right? But wait....I realized I had some of the new Rock & Roll Designer Series Paper that would go perfectly with this kit. So I decided to try the same card layout but adding an easy fun fold with the Designer Series Paper! Jazz it up just a little bit but still keeping it really simple!
The fun fold card base is a 5-1/2" x 12 inch piece of Designer Series Paper scored at 1-3/4", 4-3/4" and 7-3/4" and folded back and forth on itself with the small 1-3/4" layer secured down for the card front. You can see the top layer with the decor elements actually hangs over a little bit to give it some interest, but covers up the inside surprise where I added the fussy cut guitars from a scrap of the Designer Series Paper. I really thought they turned out nice. The first card with the guitar I added some layers of Real Red and Coastal Cabana cardstock and the second card with the giant pick and drum sticks I cut up one of the original card bases for my extra layers.
Measurements for guitar card:
- Rock & Roll DSP - 5-1/2" x 12", scored at 1-3/4", 4-3/4" & 7-3/4"
- Real Red Cardstock 3-3/4" x 5" (card front)
- Coastal Cabana Cardstock 4" x 5-1/4" (interior layer)
- Basic White Cardstock 3-3/4" x 5" (interior layer)
Measurements for drumsticks card:
- Rock & Roll DSP - 5-1/2" x 12", scored at 1-3/4", 4-3/4" & 7-3/4"
- Crushed Curry card base front cut down to 3-3/4" x 5" (card front)
- Real Red Cardstock 4" x 5-1/4" (interior layer)
- Basic White Cardstock 3-3/4" x 5" (interior layer)
Thursday, February 1, 2024
We Create Blog Hop - Sweet Deals

It's that time again for the We Create Blog Hop and the theme this month is Sweet Deals! I wanted to share one of the adorably SWEET new bundles from the Stampin’ Up! Mini Catalog (January - April 2024).
I've been having so much fun playing around with the Ice Cream Swirl bundle!! I LOVE ice cream!! It is my favorite dessert so I just had to have this cute set! I paired it with the Lighter Than Air Designer Series Paper. The colors are really great and I thought the patterns worked well with this card layout.
For this card I started with a Pool Party card base and layered a piece of the dot print DSP on top. I embossed a piece of Basic White cardstock with the crosshatch 3D Embossing Folder and adhered that to a panel of Lemon Lolly cardstock and then placed that on my card front a little off center towards the left side. The cone was cut/embossed out of the Crumb Cake cardstock and adhered to the card with adhesive. The swirl was cut out of Bubble Bath cardstock and Bubble Bath shimmer paper, layered together with dabs of Liquid Glue and then adhered to the top of the cone with Stampin' Dimensionals.
I used the smallest banner die from the Nested Essentials dies and cut one from the Pool Party cardstock. I heat embossed the sentiment on the banner and added that to the card front with Stampin' Dimensionals.
I finished off the front with a Lemon Lolly bow and some of the Rainbow Adhesive-Backed Dots.
I dressed up the inside a little bit. Just nice and simple!
- Pool Party 4" x 11", folded in half (card base)
- Lighter Than Air DSP 4-1/4" x 5-1/2"
- Lemon Lolly Cardstock 3-1/8" x 5-1/2"
- Basic White Cardstock 3" x 5-1/2" embossed
- Bubble Bath Cardstock 3" x 3-1/2" for die-cutting ice cream solid
- Bubble Bath Shimmer Paper 3" x 3-1/2" for die-cutting ice cream swirl
- Crumb Cake Cardstock 2-1/2" x 3-1/4" for die-cutting/embossing ice cream cone
- Pool Party Cardstock 1-1/2" x 1-3/4" for die-cutting sentiment banner
- Basic White Cardstock 4" x 5-1/4" for interior layer
- Lighter Than Air DSP 1" x 4" for interior layer